How to Move Pictures to a USB Flash Drive
Windows 10 and 11 · Follow the illustrated guide below to copy photos from Pictures to your USB drive.
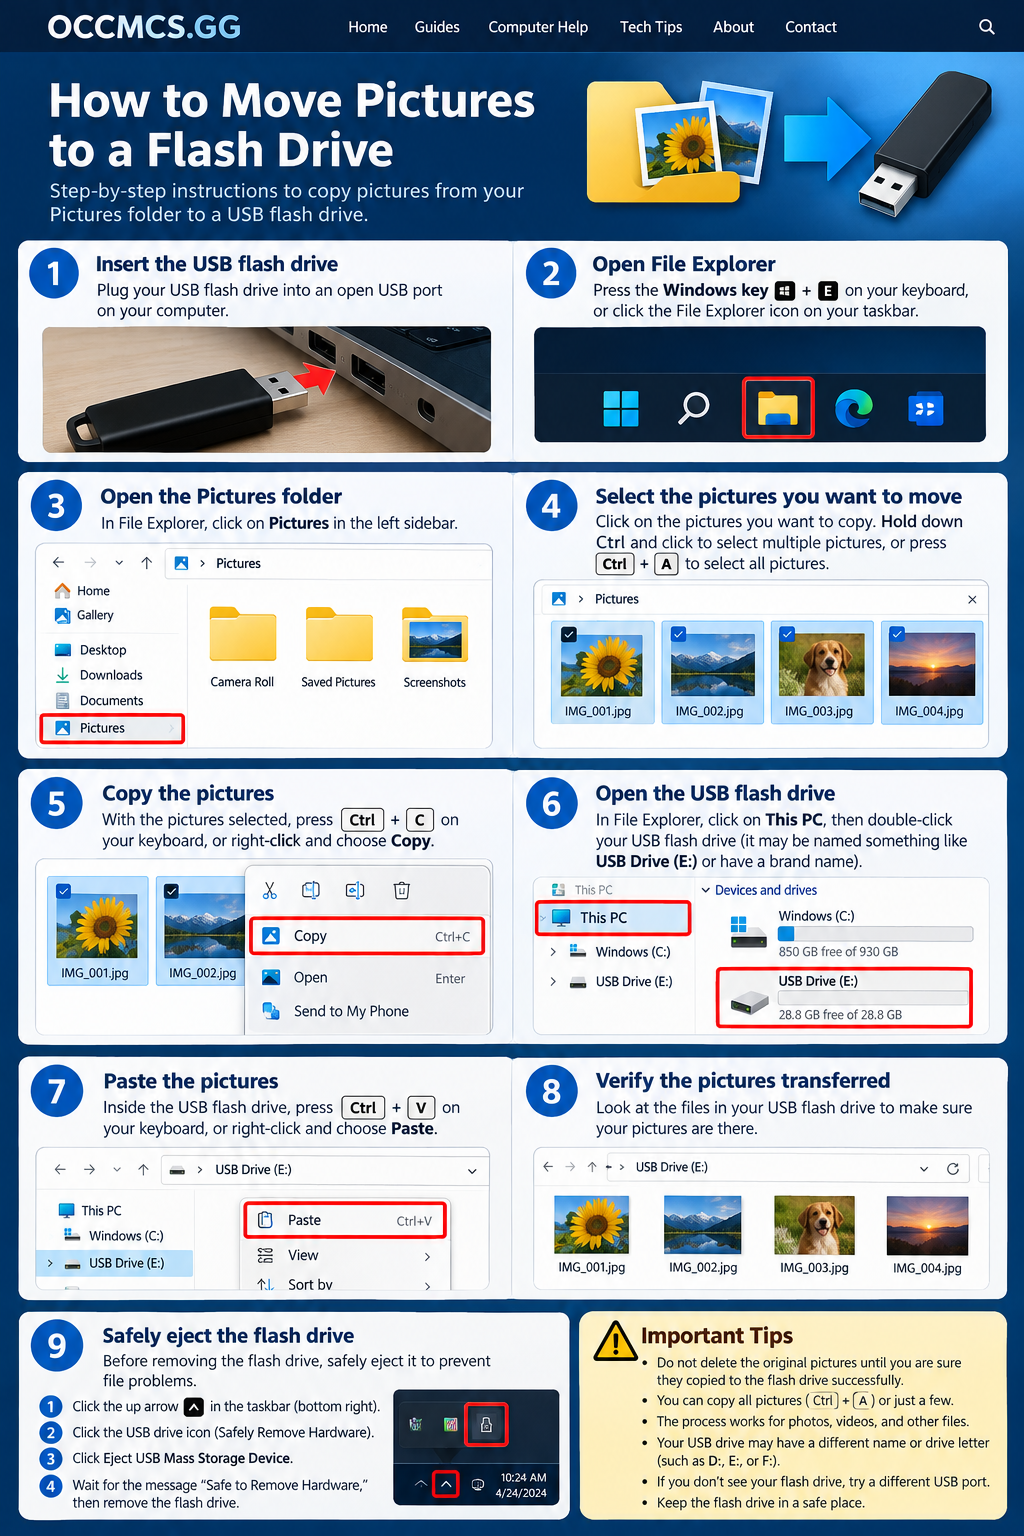
Step-by-step instructions
- 1
Insert your USB flash drive into a USB port.
- 2
Press Windows + E to open File Explorer.
- 3
Select Pictures in the left sidebar. If you do not see it, open This PC and your Pictures folder.
- 4
Select the photos. Hold Ctrl while clicking individual photos, or press Ctrl + A to select all.
- 5
Press Ctrl + C to copy the selected photos.
- 6
Select This PC and open your USB flash drive. Its name and drive letter may differ.
- 7
Press Ctrl + V to paste. Wait for copying to finish.
- 8
Open a few pictures on the USB drive to verify they copied correctly.
- 9
Use Safely Remove Hardware in the taskbar (or right-click the drive and choose Eject), then unplug it when Windows says it is safe.